Using a Compact Flash Card as IDE HD. Amiga-pimper Zener of Ozone continues pimping an Amiga by using compact flash adapters as an IDE HD.
After his JP16 tutorial on how to connect your electric girlfriend wirelessly to the web with little costs, Amiga-pimper Zener/Ozone continues in this issue with a review on the harddisk (HD) usage of compact flash adapters.
Using a Compact Flash Card as IDE HD
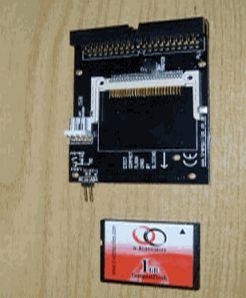
You can find them everywhere, well, in eBay mainly. The CF (Compact Flash) to IDE adaptors. As far I know the interface is very simple because CF system is based on the IDE interface. The adaptor can be found easily for less than 5 euros. Search „cf ide“ on ebay to find some of them. But, why use CF instead of a hardrive?
Pros:
– Quiet, they don’t make sound!
– They have low power consumption,
– No mobile parts, perfect for party travels!
– No extra heat
– They’re very small, they fit on A600/A1200.
– The adapter is very cheap!
– If your CF adapter has some lights on it, your Amiga will look cool in the dark.

Contras:
- Low capacity, now around 8GB
- Expensive, around 15-20 euros per GB
- Limited number of read/writes (on Amiga that’s not a big problem)
- You can have some problems with certain CF cards.
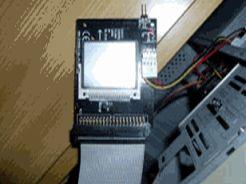
Putting the adapter is very easy, open your Amiga and locate the IDE connector. The CF adapter typically uses a floppy power connector, so you will need some skill to solve this problem. If you already have a power connector for an IDE 3.5″ HD cable the best solution is to buy a splitter, it will convert the 3.5″ power to an 3.5″ power connector and a floppy power connector. Don’t get wrong with the power cables. The power cables are the ones with four wires, not the thin one with a lot of wires (40/44). And the big ones have connectors for 3.5″ HDs and CD / DVDs. The smaller ones are for floppy drives.
Different options to use the compact flash
Other option is to split the floppy power connector of your Amiga, this may need some soldering skills… or not. What I’ve done is cut the floppy power cable (4 wires), so I have one part with the amiga connector and the other part is the floppy power end. Getting another floppy power end, I can link the two ends to the one on the Amiga. Don’t forget to insulate the links with insulating tape. You also can link the wires with other smarter methods.
Once the power subject is solved, then we have the data one. The CF IDE adapters usually use the 40 wire connector used for 3.5″ HDs, so they are not directly compatible with the 2.5″ HD connector found on A600/A1200.
The 2.5″ to 3.5″ adaptdr is something we are used to, so I will not discuss about how to get it done. But I will tell you that in shops you can find „laptop HD to 3.5″ adapters“, for less than 7 Euros. Their use is to put an 2.5″ HD in a desktop PC, but the inverse is possible. They can be used to put a 3.5″ HD on a laptop (Amiga). Enough of this…
Connect the power and data connectors, be sure they are the right way. Then put your Compact Flash on the adapter carefully. Secure the CF adapter so it can’t move doing a short circuit.
The next steps are the same as if you have a new hard drive. Switch on the Amiga and then insert workbench install disks, run HDToolBox, etc.
Well, maybe it’s not all, there are some cards like Trascend CF, that are reported to not work very well with the Amiga. Now I have one of them and it’s true they are hard to deal with. With OS3.9 and the CF as slave drive HDtoolbox doesn’t recognize the drive, and if it does, you can’t format it and gives read/write errors every time. It you can avoid that type of Compact Flash cards.
That’s what I have done with that card to make it work.
First, put the card on single card mode, then startup the Amiga with the OS3.9 emergency disk. Then run HDToolBox and detect the drive, make the partitions and edit the properties of them. MaxTransfer will be set to 0xffffff, set it to 0x000fff on all partitions and on drive. Save changes to drive.
Then reset and start with workbench disk but without startup-sequence. Run the „info“ command to see if the CF drive is mounted. If it is format this command:
format drive hcf0: name system ffs intl quick
where hcf0: is the name of the partition you are formatting. After formatting all drives the Trascend card should work normally. You can install workbench on it of make it work with other drives (after running HDToolbox again).
Be very careful if you do any modifications inside your Amiga! Putting the CF adapter is easy but make sure the power wires are in correct position and insulated and the CF adapter is secure and it doesn’t move when moving the Amiga.
If you have any problems you can write me an email (carlos.peris@gmail.com).
Greets!
Zener of Ozone: email.
